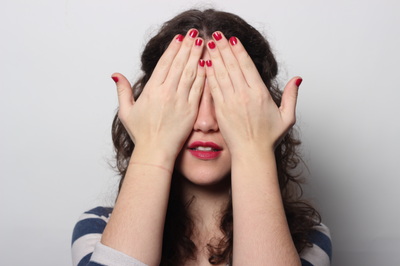
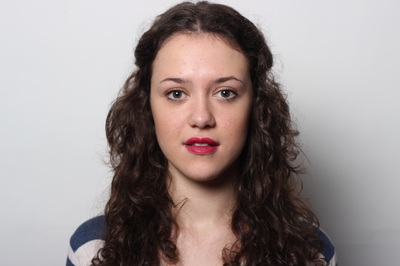
my final edited images

How I achieved this
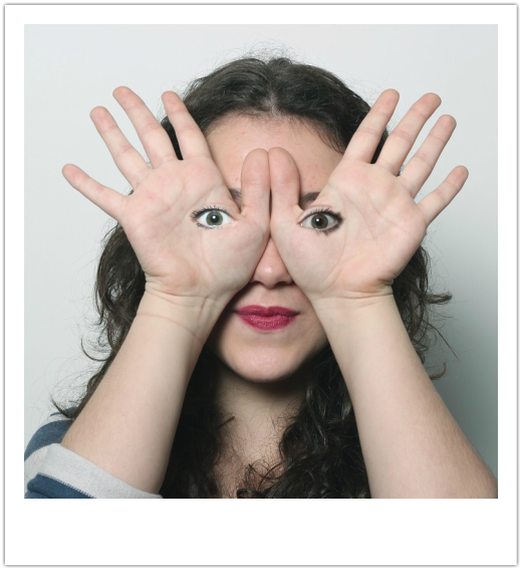
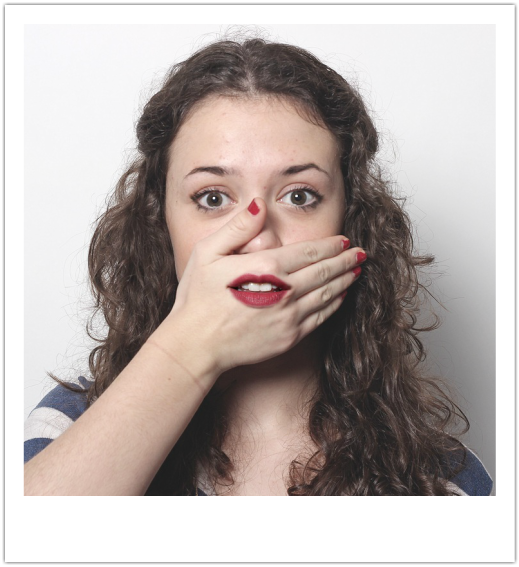
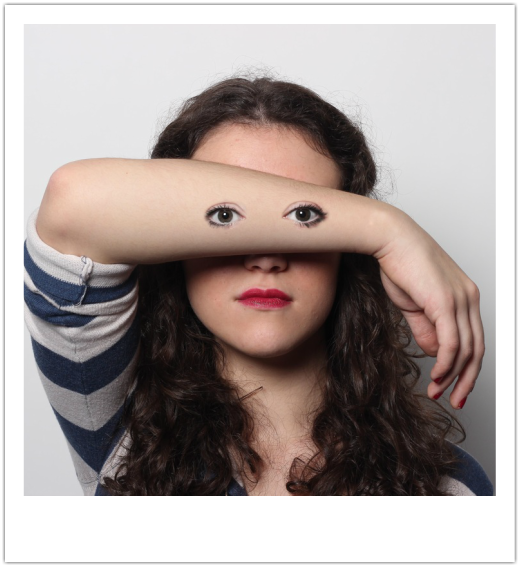
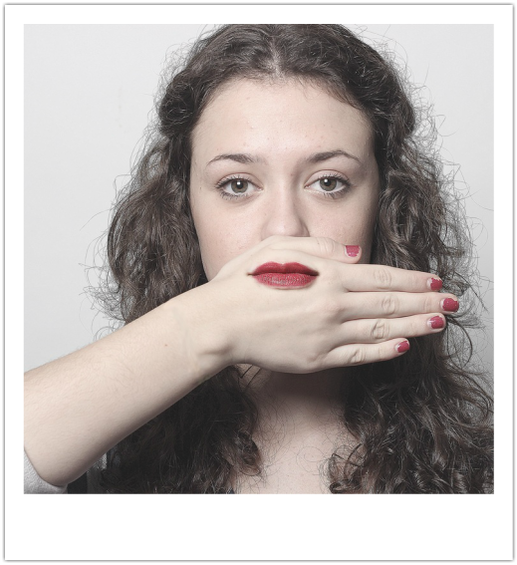
By using the studio lighting to light both sides of the models face, the skin appeared more even with very little shadow which means I had full flexibility to manipulate the skin and re-smooth it over using the blur, dodge and burn tools. The 'healing' tool was also useful when taking the eyes and placing them over the hands as I could adjust and uneven patches of skin which gave away the fact it didn't belong on her hands.
This manipulation technique is achieved by using various layers in photoshop. For example, I took one photograph with her hands over her eyes, then took another with her in the same position but with her eyes exposed. After making a quick selection around the eyes (not so neat, the skin is also needed in the cut as I blended it into the hands) and placed it over the hands. By adjusting the brightness, I could make the eyes look as though they were meant to be there by ensuring they were the same exposure as the face.
After neatening up the skin by blurring it and using the heal tool, the image could be edited as a whole to change the tone of it.
|
|
